Crafting Your Dream Swing: How to Build a DIY Golf Simulator
- Last updated on November 22, 2023
- Toni Benedito
- Golf Equipment & Gear, Blog
Create your own DIY golf simulator for year-round practice and fun. Choose a suitable space in your garage or basement, carefully build the frame using sturdy materials like wood or PVC pipes, and install a quality hitting mat. Select a compatible launch monitor for accurate data, set up a projector for realistic visuals, and choose software that suits your needs. Regular maintenance ensures longevity and top performance. Enjoy honing your skills with a customized, affordable setup at home!

Key Takeaways
- Year-Round Practice: Build a DIY golf simulator in your garage or basement for convenient, weather-independent practice.
- Customizable Setup: Tailor your simulator with quality materials, a compatible launch monitor, and user-friendly software for an affordable, personalized experience.
- Visual Realism: Enhance your setup with a carefully positioned projector, offering realistic visuals for an immersive golfing experience at home.
- Maintenance Matters: Regularly clean and check components to ensure longevity and optimal performance, maximizing the benefits of your DIY golf simulator.
- Cost-Effective Enjoyment: Save thousands compared to commercial alternatives, enjoying endless hours of entertainment and skill improvement with your self-made golf simulator.
Introduction
Golf is a sport that requires precision, patience, and practice. However, the weather, time constraints, and busy schedules may prevent golf enthusiasts from playing as much as they would like. Fortunately, with the advancements in technology, it is now possible to have a golf simulator in your own home.
Building your own DIY golf simulator can be a fun and rewarding project for those who love to tinker and want to improve their game without leaving their home. A comprehensive DIY guide is essential when building a DIY golf simulator, as it will provide step-by-step instructions on how to build and set up the simulator.
The first step in building a DIY golf simulator is choosing the right space for it. Depending on your available space at home, you might want to build it in the garage or basement where there’s enough room for the screen canvas or curved screen.
The next important component of building a DIY golf simulator is understanding all of its components. A high-quality golf simulator build usually consists of several main components: frame construction, hitting surface installation (such as a plywood base), launch monitor setup, including camera technology, or tracking technology-compatible software such as branded solutions so that you can compare your game improvement over time.
Enjoying this article? Read more:
Check out this video below from Golficity‘s YouTube channel on how to build an affordable home golf simulator:
One important factor when constructing your own do-it-yourself golf simulator guide is choosing the right hitting surface. There are many options available, including synthetic turf mats or more expensive options like custom-built surfaces designed specifically for use with simulators.
Ultimately, you want something that will accurately represent real-world play while simultaneously being durable enough to withstand frequent use without wearing down too quickly. Another important consideration when setting up your own branded software powered by high-quality tracking technology and a short-throw projector setup within the hitting net area is projector placement.
The distance between the projector and screen canvas should be carefully considered if you’re going for accuracy on ball-flight data readings via integrated launch monitor technology. Overall, building a DIY golf simulator can be an exciting project that will provide hours of entertainment for golf enthusiasts and allow them to improve their game without leaving home.
By following a comprehensive DIY guide and carefully selecting the right components, you can create a golf simulator that delivers an experience similar to what you would find in a commercial setting. With continued use, a DIY golf simulator has the potential to lower your scores and bring a new level of fun to your overall game.
Why Build a DIY Golf Simulator?
Golf is a fantastic sport that is enjoyed by millions of people around the world. However, playing golf regularly can be difficult due to weather conditions or busy schedules.
This is where building a DIY golf simulator comes in handy. It allows you to play golf from the comfort of your own home, regardless of the weather or time of day.
Plus, it’s perfect for those who are unable to get out and play on an actual course. Building your own golf simulator can be an incredibly rewarding experience.
Not only will you be able to customize it to your liking, but you’ll also save money by not having to rent out time at a local indoor golf center or purchase an expensive commercial-grade simulator. With the right tools and materials, creating a DIY golf simulator can also be quite easy and straightforward.
One of the biggest advantages of building your own golf simulator is that it allows you to practice your game year-round. Golf drills are crucial for improving your swing, accuracy, and overall performance on the course.
A home simulator allows you to work on those drills even during off-seasons when hitting real balls outdoors might not be possible. Additionally, constructing a DIY golf simulator gives you complete control over every aspect of the setup, from choosing compatible software and screen material to selecting side nets or sports netting for added safety.
You can tailor everything exactly as per your requirements. Advancements in technology, such as LED projectors or branded solutions that provide a highly realistic simulation experience while improving visibility at low power consumption levels, make it much easier than ever before to build one yourself at home!
Enjoying this article? Read more:

Understanding the Components of a Golf Simulator
When it comes to building a DIY golf simulator, understanding the components of a golf simulator is essential. Knowing what you need to build your own golf simulator will help you achieve your dream home golf simulator. One of the most critical pieces in building an easy DIY golf simulator is the launch monitor.
This device measures data on your swing and ball flight, including spin rate, clubhead speed, and launch angle. The data gathered by the launch monitor is then used to create a simulation of your shot.
Another key component of a self-made golf simulator is the hitting mat. Choosing the right hitting mat can make or break your simulator experience.
You’ll want to find one that feels like a real fairway and won’t be damaged easily by repeated strikes with clubs. The screen canvas or net used in your golf simulator construction should also be considered carefully.
A quality screen will give clear visuals, while an inadequate one may lead to poor visual format and reduced accuracy in shot tracking. When setting up your budget home golf simulator, a lamp projector or laser projector will be necessary for projecting the simulation onto the screen.
Laser projectors are more expensive but offer higher resolution and better image quality than lamp projectors. Choosing compatible software for your homemade golf simulator is also essential for simulating different courses accurately.
Look for software that suits both your budget and equipment specifications. Radars are another popular option, as they use photometric technology rather than cameras to track ball flight data accurately.
There are several key components necessary when building a DIY golf simulator: launch monitors, hitting mats, screens or nets, projectors, and software compatibility are just some items you’ll need to consider in order to build an effective home setup. With these tips in mind, along with other helpful DIY golf simulator instructions and guides found online, you’ll be well on your way toward creating an easy-to-use dream home golf simulator that you can enjoy all year round!
Choosing the Right Space for Your Golf Simulator
If you’re looking to build a DIY golf simulator, one of the first things you need to consider is where you will set it up. The ideal location for your golf simulator is a space that has enough room for the simulator system and allows you to swing your clubs freely without hitting anything.
One popular option for setting up a DIY golf simulator is in the garage. Not only does it have ample space, but it also provides a level surface and an enclosed environment that can help reduce distractions.
However, before setting up your golf simulator in the garage, ensure that there’s sufficient overhead clearance to avoid hitting the ceiling or light fixtures. Another option is to set up your golf simulator in a spare room or basement.
This may require some modifications to accommodate the size of your system comfortably, such as removing non-load-bearing walls or furniture. If you plan on using a projector, ensure that there’s enough space between the screen and projector for proper image projection.
When choosing an area for your golf simulator, also consider the lighting and soundproofing features of the room. You want an area with low ambient light, as this can affect how well you see projected images on the screen.
"When setting up your DIY golf simulator, consider lighting and soundproofing. Opt for a space with low ambient light for better image projection. For soundproofing, use acoustic foam panels if sharing space. Choose a location that provides adequate space, meets component requirements, and ensures optimal performance and enjoyment."
For soundproofing considerations, if others are sharing space with you or if you have close neighbors, adding sound-deadening material like acoustic foam panels can help keep noise levels contained. Ultimately, when selecting an area for your DIY golf simulator, choose one that provides adequate space and meets all other requirements of building components compatible with each other, such as launch monitors and sensors.
Keep software compatibility in mind when reviewing tracking technologies available in different simulators as well. Choosing the right location for your DIY golf simulator is crucial to ensuring optimal performance and maximum enjoyment while using it.
With this comprehensive DIY guide on choosing space and building components with software compatibility considered within building simulators available out there now, building your own golf simulator is easier and more practical than ever before. Whether you decide to set up in your garage, basement, or spare room, always keep in mind that it’s essential to have enough room for comfortable play and that soundproofing and lighting are key factors in maximizing the overall experience.
Enjoying this article? Read more:
Check out this video below from Gimme Golf‘s YouTube channel on how to build a diy golf simulator on a budget:
Building the Frame and Installing the Screen
Now that you’ve chosen the perfect space for your DIY golf simulator, it’s time to get started on building the frame and installing the screen. This is where you’ll really start to see your vision come to life! First things first, decide whether you want to build your own screen enclosure or opt for a ready-made enclosure.
A ready-made enclosure can save you time and hassle in the building process, but building your own can be more affordable and give you more flexibility in terms of size and shape. Once you’ve decided on an enclosure, it’s time to start constructing the frame.
You’ll need some sturdy materials, like wood or PVC pipes. Some people even use metal conduit as a lightweight but durable option.
You’ll need to measure out your space carefully so that your frame fits snugly against the walls and ceiling. Next comes installing the actual screen material.
Sport netting is a popular choice because it’s affordable and easy to work with, but there are other options like blackout curtains or even white bed sheets that can work just as well! Make sure that whatever material you choose is taut enough so that when a ball hits it, there won’t be any sagging.
"Choose between a ready-made or DIY enclosure for your DIY golf simulator. Build a sturdy frame with wood or PVC pipes, ensuring a snug fit. Use sport netting or other taut materials for the screen. Securely mount tracking tech on walls or ceiling, and install necessary hardware for projectors, TVs, or launch monitors. Follow manufacturer guidelines for a successful setup."
If you’re using tracking technologies like radar or optical sensors, make sure they’re mounted securely on the walls or ceiling so they stay put during gameplay. You don’t want them shifting mid-game!
Install any necessary hardware for simulator setup onto your frame; this includes projectors or TVs if you’ll be using those for visuals, along with a launch monitor if necessary. Remember: if in doubt about installation instructions for any component of your DIY golf simulator setup, always refer back to manufacturer guidelines.
With these steps complete, you’re now ready to start practicing those game-improvement golf drills from home! Just make sure to integrate branded software with accurate tracking technology so that every swing counts, no matter how hard or soft it may be!
Enjoying this article? Read more:
Setting Up the Launch Monitor
The launch monitor is one of the key components of any high-quality golf simulator build.
It provides you with a wealth of data about your shots, including ball speed, launch angle, spin rate, and more. But setting up the launch monitor correctly can be tricky, so be sure to follow these DIY golf simulator instructions carefully.
First and foremost, you’ll need to choose a launch monitor that’s compatible with your chosen golf simulator software. There are many different models available on the market today, from standalone units to those that are integrated into a complete simulator system.
Make sure you do your research and choose one that will work well for your needs. Once you have your launch monitor in hand, it’s time to start setting it up.
Begin by deciding on the location for your stance mat; this is where you’ll actually hit the ball during gameplay. The stance mat should be positioned so that it lines up with the center of the screen or projector.
"The launch monitor is a crucial component of any golf simulator. It provides valuable shot data, including ball speed and spin rate. Choose a compatible monitor, set up the stance mat aligned with the screen, and install a sturdy net behind it. Follow manufacturer instructions closely for proper installation, ensuring accurate shot tracking. With everything calibrated and compatible, enjoy endless hours of immersive golf simulator fun!"
Next, set up a net or other form of sports netting behind the stance mat to catch any errant shots. Be sure to choose a netting material that’s strong enough to withstand repeated impacts from golf balls without breaking down over time.
With these preliminary steps taken care of, it’s time to install the actual launch monitor itself. Most models come with detailed installation instructions included in the box; follow these closely for the best results.
When installing your radar or other type of launch monitor device, be sure to position it at a height and angle that will allow it to accurately track all aspects of your shot. You may need some basic knowledge of pipe framing or construction design in order to create an enclosure or frame for supporting this equipment, if necessary.
With everything properly set up and calibrated according to manufacturer recommendations (and software compatibility), you’re now ready for hours upon hours of brag-worthy golf simulator fun! Just remember: maintaining your DIY golf simulator over time will require ongoing effort, but the end result is a rewarding and unforgettable simulator experience.
Enjoying this article? Read more:
Check out this video below from The Average Golfer‘s YouTube channel on how to build your own golf simulator room on a budget:
Choosing and Installing the Hitting Mat
The hitting mat is one of the most important components of your DIY golf simulator. It’s where you’ll stand and hit shots, so it’s crucial to choose a high-quality mat that can handle your swings.
There are several types of mats available on the market, but the best one for your simulator will depend on your budget and preferences. When it comes to choosing a hitting mat, you should consider factors such as thickness, durability, size, and texture.
A thicker mat will provide more cushioning to absorb shock from your swings and reduce joint pain. Durability is also vital because hitting mats tend to wear out with frequent use over time.
Opt for a durable mat that can withstand heavy traffic. Size is another critical factor to consider when selecting a hitting mat for your DIY golf simulator.
The size should be big enough to accommodate all types of shots you would like to practice, but not so big that it takes up too much space in your room. Texture is also essential because it affects ball flight and spin rates.
"Choose a durable hitting mat with realistic textures for your DIY golf simulator. Secure it on a sturdy base to prevent movement during swings. Consider a DIY net enclosure for safety and a more realistic experience."
Look for a mat with realistic turf-like textures that mimic the feel of real grasses found on golf courses. Once you’ve chosen the right hitting mat for your DIY golf simulator, it’s time to install it properly.
This process involves securing the mat onto a sturdy base so that it doesn’t move during swings. You can create a DIY net enclosure using PVC pipes or buy an enclosure kit online from branded solution providers (such as Carl’s Place).
This enclosure will prevent balls from flying off into walls or windows while protecting them against any damage or breakage. Overall, getting this part right in building an indoor golf setup will enhance your simulation software experience by allowing you to simulate various terrains, such as sand traps or bunkers, making each swing more realistic than before!
Enjoying this article? Read more:
Setting Up the Projector
Now that your golf simulator frame is built, the hitting mat is chosen, and the launch monitor is set up, it’s time to focus on setting up the projector. The projector will be responsible for displaying your golf course visuals on your simulator screen.
First things first, you’ll need to choose the right projector for your needs. If you’re on a tight budget, opt for a lamp projector, as they are generally more affordable than LED projectors.
However, LED projectors offer much better picture quality and are more energy-efficient in the long run. Also, consider getting a short-throw or ultra-short-throw projector if you have limited space since they can be placed close to the screen and still display a large image.
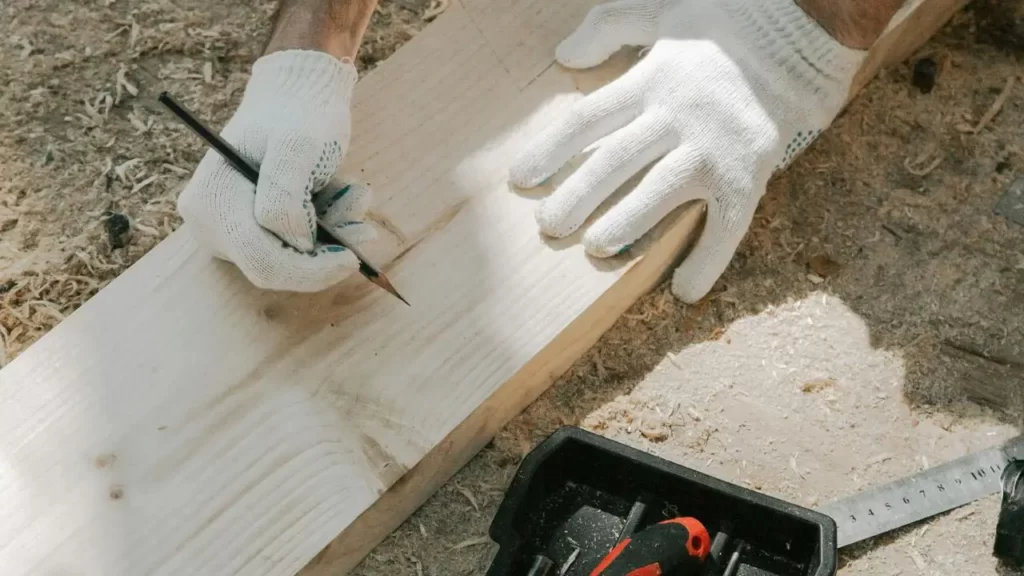
Once you’ve chosen your ideal projector, it’s time to mount it onto your golf simulator frame. Mounting brackets can be purchased online or at your local hardware store, along with other building materials needed for this step.
Positioning the projector correctly is crucial; it’s important to make sure that the image is being projected onto the screen at eye level when standing on the hitting strip or stance mat. If necessary, adjust the height of both the screen and projector accordingly.
"Connect HDMI cables from the launch monitor and computer to the projector, ensuring secure connections. Adjust settings for compatibility between your computer and golf simulator software. With these steps, you've set up an affordable home golf simulator. Now, practice your swings in front of this dream setup!"
Next up is making sure that all cables are connected properly. HDMI cables will likely be needed for connecting both your launch monitor and computer or laptop to your projector. Make sure all connections aren’t loose before powering everything up.
Adjust any necessary settings on both your computer/laptop and golf simulator software so that they’re compatible with each other by plugging into external displays like projectors; this will ensure that everything works smoothly while playing virtual golf courses. And there you have it!
With these steps completed successfully, you’ve now set up an affordable home golf simulator from scratch by following basic DIY simulator instructions! Now all that’s left to do is practice hitting balls into a sports net or golf net in front of this dream home golf simulator.

Choosing the Right Golf Simulator Software
When it comes to choosing the right golf simulator software, there are a few key factors to consider. The first is software compatibility.
Make sure that the software you choose is compatible with your chosen launch monitor and projector. Some simulators come with their own software, while others are compatible with third-party options.
Another important consideration is the accuracy of the simulation. Look for a simulator that uses advanced tracking technologies to accurately measure ball flight and provide realistic shot data.
This data can then be used to improve your game and help you make better decisions on the course. Many simulators also offer a variety of game modes and challenges, which can keep things interesting and engaging over time.
Look for simulators that offer a wide range of game modes, including practice ranges, skill challenges, and full-course play. If you’re taking a DIY approach to building your golf simulator, it’s important to choose software that’s user-friendly and easy to set up.
"Choose golf simulator software compatible with your launch monitor and projector. Prioritize accuracy and diverse game modes. For DIY setups, opt for user-friendly software. Consider projector types based on space. Research thoroughly for an optimal homemade golf simulator experience."
Many DIY simulators use open-source simulation software that can be customized and tweaked to fit your specific needs. When it comes to projectors, there are two main types: lamp projectors and laser projectors.
Lamp projectors tend to be more affordable but may require more maintenance over time. Laser projectors are more expensive but offer better image quality and longer lifespans.
Consider the space available in your garage or shed when choosing a golf simulator software package. Some simulators require large netting barriers or foldable enclosures for safety reasons; others may require specific hitting surfaces or lighting conditions for optimal performance.
Overall, choosing the right golf simulator software is critical for getting the most out of your homemade golf simulator setup. Take time to research different options before making a decision—read reviews online, consult with other enthusiasts in online forums or Facebook groups, or check out some of the many online guides on golf simulator construction available today!
Finalizing Your Setup
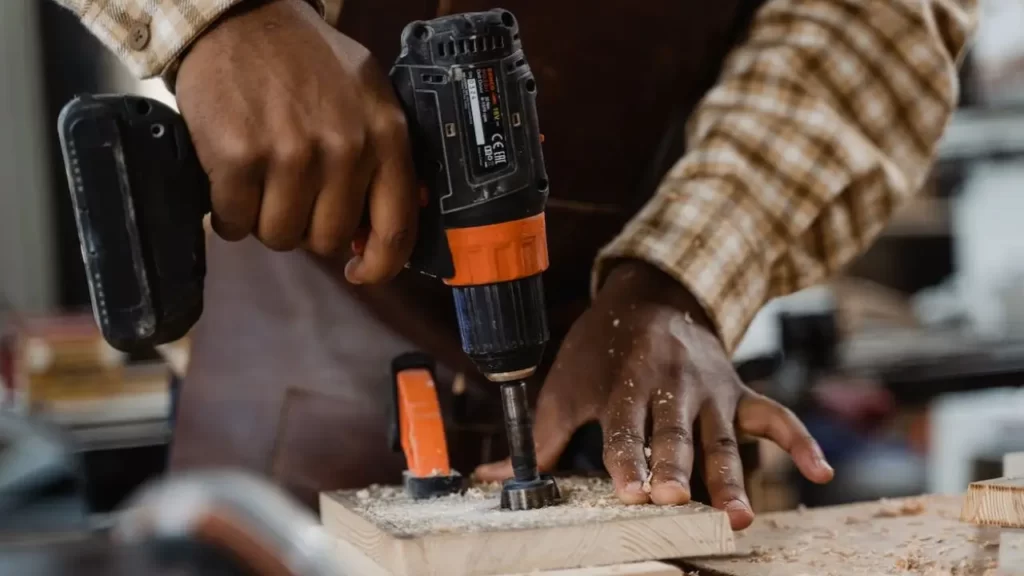
Now that you’ve got all the hardware components set up for your DIY golf simulator, it’s time to finalize your setup by installing and configuring the software. Without compatible software, all those sensors and radars won’t be able to do much for you. So it’s essential to choose the right branded or DIY golf simulator software that can help you get the most out of your equipment.
For self-made golf simulators, there are many options available online that can help guide you through setting up the software. However, if you’ve opted for branded solutions like SkyTrak or Trackman, then their respective branded software will be your best bet.
Once you’ve installed your golf simulator software and configured it to work with all of your components, it’s time to test everything out. You’ll want to make sure that everything is working correctly and that all of the sensors and infrared cameras are picking up accurate data.
"Install compatible software for your DIY golf simulator. Test for accuracy, add a golf net for protection, and evaluate overall usability. With these final touches, enjoy honing your skills confidently at home!"
Next, consider adding a golf net behind your hitting mat. This will protect any stray balls from damaging anything in the room while also giving you a more authentic feel when practicing.
You could either purchase a pre-made net online or opt for building one yourself with some pipe framing and screen canvas. Take some time to evaluate your simulator setup overall by considering how well it meets your needs as a golfer.
Review how easy it is to use and how accurate its readings are compared with real-life conditions on the course or at range; this will help determine what adjustments may need to be made, such as moving sensor locations closer together or further apart depending on accuracy issues observed during testing sessions. With these final touches in place, now is a great time to sit back and enjoy honing those skills from home with full confidence, knowing that every aspect of this DIY project was done right!
Check out this video below from The Average Golfer‘s YouTube channel on how to build a DIY garage golf simulator without sacrificing parking:
Maintaining Your Golf Simulator
Congratulations! You’ve completed your DIY golf simulator build!
Now, it’s essential to maintain your setup to ensure that it lasts for years to come. Here are some tips on how to take care of your golf simulator and keep it in top shape.
Firstly, make sure you keep the screen material clean and free from any dirt or debris that might accumulate over time. Use a soft cloth or a gentle cleaner, and wipe the screen down regularly.
This will prevent any damage caused by a buildup of dirt or dust that might affect the image quality. Another critical aspect of maintaining your golf simulator is checking all the building components regularly.
Over time, screws can loosen up, and bolts may need tightening; checking all the connections ensures that everything remains sturdy and secure. If you’ve built an outdoor golf simulator with a netting enclosure, check the netting barriers for any holes or tears that might have occurred due to weather conditions or wear and tear.
"Repair areas promptly to prevent worsening and regularly monitor your launch monitor's performance. Refer to your guide for recalibration needs and update golf simulator software for enhanced gameplay and compatibility. Maintain your DIY golf simulator with regular cleaning and upkeep for longevity, ensuring quality entertainment without breaking the bank."
Repairing these areas promptly will prevent them from becoming worse over time. It’s also essential to keep an eye on your launch monitor’s performance regularly.
Some models may require recalibration after a specific amount of usage, so refer to your launch monitor guide for guidance on how often you should do this. Make sure you update your golf simulator software as new versions become available.
Many branded software programs offer updates with bug fixes and new features that enhance gameplay. Keeping up-to-date ensures compatibility with other components like projectors or launch monitors while avoiding potential issues in the future.
Maintaining your DIY golf simulator doesn’t have to be complicated; regular cleaning and upkeep ensure longevity while providing quality entertainment value without breaking the bank. Whether you’ve built an easy DIY golf simulator at home or invested in a high-quality golf simulator built with infrared sensors and photometric technology, proper maintenance is key!
Conclusion
Congratulations! By building your own DIY golf simulator, you’ve taken a big step towards improving your golf game without ever having to leave the house.
With a self-made golf simulator, you have the convenience and flexibility to practice whenever you want, in whatever weather conditions you like. You’ve also saved thousands of dollars compared to purchasing a high-quality golf simulator built by a commercial vendor.
Whether you’re using it for fun and entertainment or focused on game improvement, your homemade golf simulator will provide endless hours of enjoyment and challenge. With the proper equipment, such as a screen and enclosure, hitting surfaces, and simulation software, you can simulate realistic games on some of the world’s most famous courses.
When building your own golfer’s paradise at home with sports netting and a short-throw projector, consider basic features for an accurate experience. The most important part is getting simulation software compatibility right before purchasing any equipment.
As it was mentioned before, software solutions are essential for any effective installation, and making sure this is done right can save you time and money down the line. Remember that there are many ways to customize your DIY golf simulator setup according to space availability or personal preferences, whether it be using pipe frames or plywood bases for building the frame or installing stereoscopic technology.
The possibilities are endless with just some creativity. Maintaining your golf simulator is as important as building it.
Make sure to clean it regularly by wiping down screens or changing out hitting surfaces when they get worn out. This will ensure that you continue enjoying its benefits for years to come.
Overall, building a DIY golf simulator can be challenging but extremely rewarding, especially when hitting balls into targets without worrying about weather elements all year round! Enjoy playing the sport you love in any environment with an affordable setup that fits perfectly within your home!
Share this Post
Toni Benedito
Keep Reading
Follow Us
Recent Posts

How Do Pro Golfers Get Paid? The Business of Golf
Professional golfers get paid both before and after tournaments. Before a tournament, they receive appearance fees, sometimes exceeding $1 million, to attract top players. After the tournament, earnings depend on their placement, with the PGA

How Much Do Golf Players And Pros Make? You Won’t Believe It!
Professional golfers earn substantial incomes through tournament winnings, sponsorship deals, and endorsements. Top players on the PGA Tour can make millions annually, with significant earnings from prize money and lucrative brand partnerships. For example, Rory

The Shocking Cost: How Much Does It Cost to Fly with Golf Clubs?
Flying with golf clubs can be a hassle, but it’s worth it for avid golfers. Costs vary by airline, ranging from $30 to $150 per way. Southwest Airlines offers a generous policy, allowing one set

Why Do Golfers Tape Their Fingers Before Hitting the Course?
Golfers tape their fingers to prevent injuries from repetitive motions, provide support for existing injuries, and improve grip comfort. It’s a popular technique among amateurs and pros alike, offering a lightweight and effective solution compared

How Much Does a Round of Golf Cost? Are You on Par?
The cost of a round of golf varies widely based on factors like course type, location, and time of play. Public courses typically range from $30-$100 per round, while exclusive ones like Augusta National or

Hidden Fees: How Much Does It Cost To Rent a Golf Cart
Wondering how much it costs to rent a golf cart? Explore factors like location, rental duration, and cart type impacting prices. Daily rates range from $50 to $80, while weekly rentals can vary from $200
Table of Contents


